
Class 2 Cost Estimates: Precision in Piping Project Budgeting
In my two decades of managing complex piping infrastructure, I have learned that the transition from conceptual planning to execution hinges entirely on the reliability of your financial data. A Class 2 cost estimate is not merely a spreadsheet; it is the definitive financial baseline that determines whether a project proceeds to procurement or returns to the drawing board. When we reach this stage, we are no longer dealing with parametric guesses but with concrete material take-offs and validated labor productivity rates.
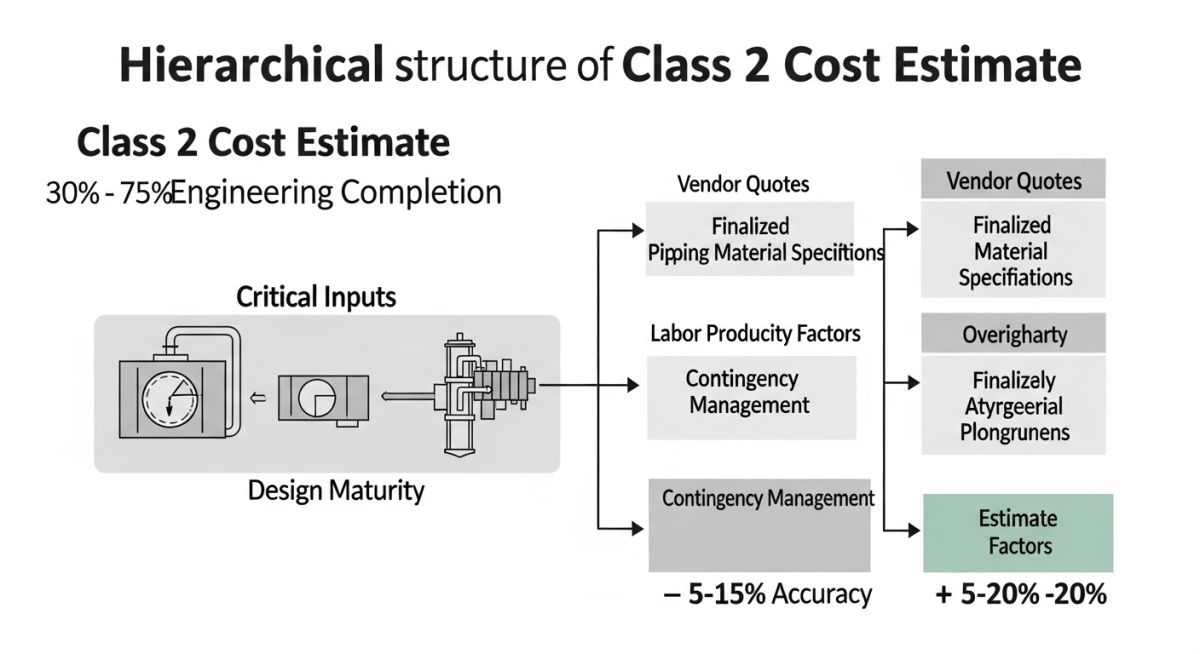
Achieving accuracy within the typical -5% to -15% and +5% to +20% range requires a rigorous integration of P&IDs, piping specifications, and preliminary stress analysis reports. If your team is struggling with budget overruns, the culprit is often a premature jump into procurement before the Class 2 estimate has been fully reconciled against the latest design revisions.
Key Takeaways for Project Success:
- Align your estimate with AACE International Recommended Practice 18R-97.
- Ensure piping material take-offs (MTOs) are derived from at least 50% complete P&IDs.
- Incorporate site-specific labor productivity factors based on regional craft availability.
- Validate all long-lead equipment quotes against current market volatility indices.
Technical Deep-Dive: Class 2 Cost Estimates for Piping
Class 2 Cost Estimates: A high-fidelity financial projection requiring significant engineering maturity, typically utilizing deterministic estimating methods to establish a control budget for project authorization.
When I prepare a Class 2 estimate, I focus on the “Deterministic” aspect. Unlike Class 4 or 5 estimates that rely on capacity factoring, a Class 2 estimate demands a bottom-up approach. We start by extracting quantities from the 3D model or detailed piping orthographics. For piping, this means calculating total linear footage by diameter and schedule, counting every valve, flange, and fitting, and applying specific welding hours based on the ASME B31.3 code requirements for the specific fluid service.
The calculation of labor costs is where most projects fail. I utilize the following formula structure for field labor:
Total Labor Cost = (Sum of [Quantity * Unit Man-Hours]) * (Regional Productivity Factor) * (Average Craft Hourly Rate)
The “Regional Productivity Factor” is not a static number. It must account for site congestion, weather conditions, and the specific complexity of the piping system (e.g., high-alloy welding vs. carbon steel). If you are working in a brownfield environment, you must add a “Brownfield Multiplier” (typically 1.25 to 1.50) to account for tie-in complexity and existing infrastructure interference.
Field Warning: The Procurement Trap
Never finalize a Class 2 estimate using budgetary quotes from vendors that are older than 90 days. In the current market, steel and alloy pricing fluctuates rapidly. Always request “Firm Price” quotes for all long-lead items (valves > 12 inches, specialty alloys, and custom-fabricated spools) to ensure the estimate remains within the required accuracy range.
Furthermore, the integration of stress analysis is vital. If the piping stress report indicates the need for additional spring hangers or complex expansion loops, these must be reflected in the MTO. A common mistake is to estimate piping based on the shortest path between two points. I always apply a “Routing Complexity Factor” of 1.15 to 1.25 to account for actual field routing requirements that are often missed in early-stage layouts.
Class 2 Cost Estimates: A strategic financial tool that balances the need for high-accuracy budgeting with the practical constraints of engineering design maturity.
Advantages
- Provides a stable baseline for final project authorization.
- Enables precise procurement of long-lead piping materials.
- Reduces the risk of significant budget variance during construction.
- Allows for granular tracking of labor productivity by discipline.
- Facilitates accurate cash flow forecasting for the project lifecycle.
Disadvantages
- Requires significant engineering hours to reach maturity.
- High cost of preparation compared to earlier estimate classes.
- Susceptible to errors if design changes occur post-estimate.
- Can create a false sense of security if contingencies are ignored.
- Demands high-level coordination between procurement and engineering teams.
Class 2 Cost Estimates: Essential financial frameworks applied across capital-intensive sectors to ensure project viability and fiscal responsibility during the detailed design phase.
Petrochemical Plant Expansions
In brownfield petrochemical projects, Class 2 estimates are used to quantify the cost of complex tie-ins and existing pipe rack modifications. By utilizing detailed laser scans, engineers can generate accurate MTOs that account for the physical constraints of the existing plant, ensuring the budget covers the high labor costs associated with working in live process areas.
High-Pressure Hydrogen Infrastructure
For hydrogen transport systems, the material costs for specialized stainless steel and high-nickel alloys are extreme. A Class 2 estimate is required to lock in these material costs through early procurement contracts, protecting the project from the volatility of specialty metal markets while ensuring the design meets strict safety standards.
Offshore Platform Piping Upgrades
Offshore environments demand extreme precision due to the high cost of logistics and limited deck space. Class 2 estimates here focus on modular construction costs, where piping spools are fabricated onshore and shipped to the platform, requiring rigorous weight and space budgeting to avoid costly offshore rework.
In my two decades of managing capital projects, I have found that the transition from a Class 3 to a Class 2 cost estimate represents the most significant “make or break” phase for project viability. While Class 3 estimates are often based on preliminary P&IDs and general equipment lists, a Class 2 estimate requires a substantial increase in engineering definition, typically reaching 30% to 70% of total project completion. This level of rigor is mandated by AACE International standards to ensure that the final investment decision is backed by firm vendor quotes rather than budgetary placeholders.
The table below outlines the critical engineering data inputs required to move your estimate into the Class 2 accuracy range of -5% to -15% on the low end and +5% to +20% on the high end. You must ensure that your piping material specifications are finalized and that major equipment procurement packages have been issued for bid. Failure to align these inputs with the required engineering maturity will result in a “false” Class 2 estimate that inevitably leads to massive cost overruns during the construction phase.
| Engineering Input | Maturity Level | Impact on Accuracy |
|---|---|---|
| Piping & Instrumentation Diagrams | Issued for Design (IFD) | High (Defines MTO quantities) |
| Major Equipment Quotes | Firm Vendor Bids | Critical (Primary cost driver) |
| Plot Plan / Layout | Approved for Construction (AFC) | Medium (Affects piping runs) |
To effectively manage the complexity of a Class 2 cost estimate, engineers must map technical entities against their respective project control standards. This matrix serves as a cross-reference tool for project managers to verify that every technical discipline—from structural steel to instrumentation—is contributing the necessary data to the cost model. By aligning these entities with ASME and API standards, you ensure that the estimate reflects the actual technical requirements of the facility.
The following matrix categorizes the primary technical inputs that define the cost baseline. Note that the “Standard Reference” column points to the governing codes that dictate the material and labor requirements for each entity. Using these references during the estimation process prevents the common pitfall of underestimating labor hours for specialized welding or non-destructive testing (NDT) procedures, which are often overlooked in lower-class estimates.
| Technical Entity | Primary Parameter | Standard Reference |
|---|---|---|
| Pressure Piping | Wall Thickness / Schedule | ASME B31.3 |
| Storage Tanks | Shell Plate Thickness | API 650 |
| Structural Steel | Tonnage / Coating | AISC 360 |
Before finalizing a Class 2 estimate, I mandate a comprehensive site verification process. This ensures that the theoretical design captured in your P&IDs and 3D models aligns with the physical realities of the brownfield or greenfield site. Skipping these verification steps is the primary cause of “scope creep” during the execution phase, as unforeseen site conditions often require expensive piping reroutes or structural modifications that were not accounted for in the initial budget.
Verification Checkpoints
- ✓ Tie-in Point Validation: Physically verify all existing piping tie-in points for accessibility and current condition.
- ✓ Soil Bearing Capacity: Confirm that geotechnical reports match the structural foundation requirements for heavy equipment.
- ✓ Utility Availability: Verify that existing power, water, and instrument air headers can support the new load.
- ✓ Constructability Review: Ensure that crane access paths are clear and that modular components can be transported to the site.
- ✓ Permit Requirements: Confirm that all environmental and safety permits are included in the indirect cost section of the estimate.
Each item on this checklist must be signed off by the lead discipline engineer. If a site condition deviates from the design basis, the cost estimate must be updated immediately to reflect the necessary mitigation measures. Remember, a Class 2 estimate is a living document; it must evolve as site data becomes more granular. By maintaining this level of discipline, you protect the project from the volatility of unverified assumptions and ensure that your budget remains within the target accuracy range.
The Problem: Inaccurate Tie-in Assumptions
During a refinery expansion project, the team relied on legacy drawings for existing piping tie-ins, leading to a significant underestimation of the required field modifications.
- Legacy drawings failed to show a 2-inch offset in the existing header.
- The lack of field verification resulted in 15 additional field welds.
- NDT costs spiked due to the unexpected complexity of the tie-in geometry.
- Project schedule slipped by two weeks due to rework.
The Outcome: Implementing Rigorous Verification
By mandating a 3D laser scan of all tie-in points for the subsequent phase, the team achieved a 95% reduction in field rework and maintained the budget within the Class 2 accuracy range.
- Laser scanning identified all physical interferences prior to procurement.
- Piping spools were fabricated to exact field dimensions, eliminating field fit-up issues.
- Total project cost variance was reduced to within 3% of the estimate.
- Safety incidents were minimized by reducing the time spent in high-risk areas.
My recommendation is to always treat existing site data with skepticism. In my experience, the cost of a laser scan or a physical site walk-down is negligible compared to the cost of a single day of field rework. Always prioritize physical verification over historical documentation when preparing your Class 2 cost estimates.
What is the primary difference between Class 3 and Class 2 estimates?
- Firm vendor quotes for all major equipment packages.
- Detailed material take-offs (MTOs) derived from 30-70% complete design drawings.
- A comprehensive risk assessment that quantifies contingency based on specific project threats.
How do I handle contingency in a Class 2 estimate?
- Use Monte Carlo simulations to model the range of possible outcomes.
- Ensure that the contingency covers both known-unknowns and project-specific technical challenges.
- Document the basis for every contingency line item to provide transparency to stakeholders.
Why is procurement input critical for Class 2 accuracy?
- Firm bids allow you to lock in pricing and delivery schedules, reducing commercial risk.
- Detailed technical specifications in the bid packages ensure that the quoted price includes all necessary features.
- Early procurement engagement helps identify long-lead items that could impact the project schedule and, consequently, the indirect costs.
What role does the piping MTO play in this estimate?
- Ensure that the MTO includes all fittings, valves, and specialty items, not just pipe lengths.
- Apply a realistic waste factor based on the complexity of the piping configuration.
- Verify that the MTO aligns with the project’s piping material specifications (PMS) to avoid costly procurement errors later.
How do I account for labor productivity in the estimate?
- Adjust for weather conditions, shift patterns, and site congestion.
- Include the cost of specialized labor for high-pressure or exotic alloy welding.
- Factor in the learning curve for new crews if the project involves repetitive tasks.
Can I use software to automate Class 2 estimates?
- Use software to ensure consistency across different project areas.
- Always perform a manual “sanity check” on the outputs to identify anomalies.
- Remember that the software is only as good as the input data; garbage in, garbage out remains the golden rule of cost estimation.
📚 Recommended Resources: Class 2 Cost Estimates
Complete Course on
Piping Engineering
Check Now
Key Features
- 125+ Hours Content
- 500+ Recorded Lectures
- 20+ Years Exp.
- Lifetime Access
Coverage
- Codes & Standards
- Layouts & Design
- Material Eng.
- Stress Analysis